Deploy Node.js Application on Windows Server IIS

Steps for Deploying Node.js App on IIS
- Node.js install
- iisnode install
- Write a simple Node server code
- Create web.config file
- IIS Configuration Editor - "config unlock" - important!

Installing Node.js on Windows Server
Installing Node.js on a Windows Server machine is essential for running and executing Node.js applications on the server. Node.js acts as a JavaScript runtime environment, enabling the development of server-side applications.
You can download the Node.js installer from https://nodejs.org.
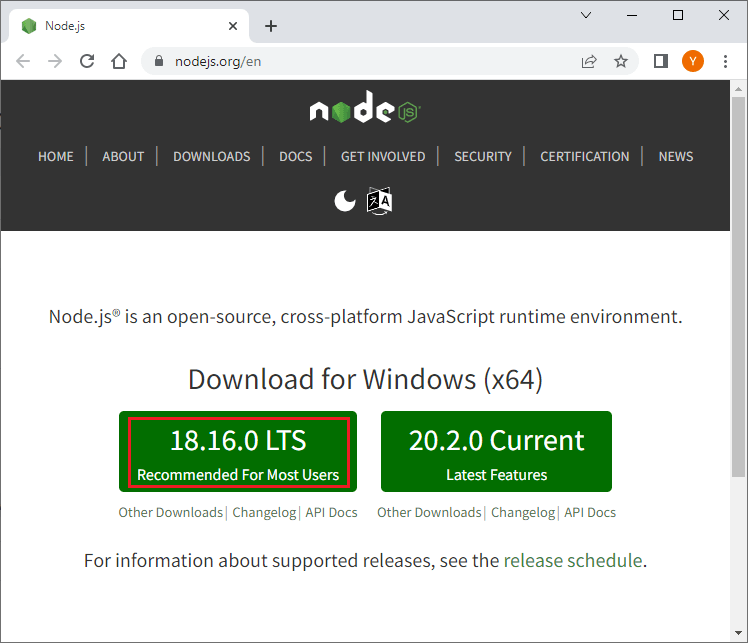
When downloading Node.js, you'll find separate options for LTS and Current versions. LTS releases in Node.js provide "Long-Term Support" and maintenance. LTS is recommended unless you need the latest features.
To check the version of Node.js installed on your system, you can use the command-line interface (CLI). Open CMD and type the following command:
node -viisnode
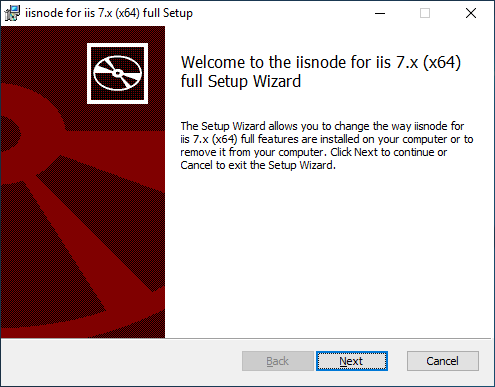
iisnode is a module for Internet Information Services (IIS) that enables hosting and running Node.js applications on Windows servers. It acts as a bridge between IIS and Node.js, allowing you to leverage the power of both technologies.
With iisnode, you can seamlessly integrate Node.js applications into the IIS web server infrastructure. It provides benefits such as improved performance, scalability, and security for hosting Node.js applications on Windows servers.
You can download iisnode from the official GitHub repository maintained by Microsoft Azure: https://github.com/Azure/iisnode.
Basic code
This code is sufficient for running a basic Node.js server without the need to install any additional packages or modules. It relies solely on the built-in http module provided by Node.js.
You need to create a file named server.js and paste the code into it.
const http = require('http');

http.createServer(function (req, res) {
    res.writeHead(200, {'Content-Type': 'text/plain'});
    res.end('Hello, world!');
}).listen(process.env.PORT);
The http module is a core module in Node.js that allows you to create HTTP servers and handle HTTP requests and responses. By using this module, you can set up a basic server, define how it should handle incoming requests, and send back responses.
If you are using external Node.js packages in your project, you typically need to include the
node_modulesfolder alongside yourserver.jsfile.
Copy the server.js file to the inetpub/wwwroot/yourdomain folder.
By copying the server.js file to the wwwroot folder, you ensure that IIS can find and execute your Node.js application as the entry point for handling incoming requests.
web.config
<configuration>
<location path="server.js" overrideMode="Allow">
<system.webServer>
<handlers>
<add name="iisnode" path="server.js" verb="*" modules="iisnode" />
</handlers>
<!-- fix 'The iisnode module is unable to start the node.exe process' -->
<iisnode
nodeProcessCommandLine=""%programfiles%\nodejs\node.exe""
interceptor=""%programfiles%\iisnode\interceptor.js""
loggingEnabled="false" /><!-- Disable logs -->
<!-- fix '405 Method Not Allowed' -->
<modules>
<remove name="WebDAVModule"/>
</modules>
</system.webServer>
</location>
<system.webServer>
<defaultDocument>
<files>
<remove value="default.aspx" />
<remove value="index.html" />
<remove value="index.htm" />
<remove value="iisstart.htm" />
<remove value="Default.asp" />
<remove value="Default.htm" />
<add value="server.js" />
</files>
</defaultDocument>
<rewrite>
<rules>
<rule name="server">
<match url="/*" />
<action type="Rewrite" url="server.js" />
</rule>
</rules>
</rewrite>
</system.webServer>
</configuration> The <location> element in the provided configuration snippet is used in the web.config file of an IIS (Internet Information Services) server to specify configuration settings for a specific path or file.
path="server.js": This attribute specifies the path or file for which the configuration settings will be applied. In this case, the settings within the <location> element will only apply to the "server.js" file.
By using the <handlers> element and the <add> element within it, you define a handler named "iisnode" that matches requests for the server.js file and uses the "iisnode" module to process those requests. This configuration allows IIS to route incoming requests for server.js to the appropriate handler, which can execute the Node.js code and generate the response accordingly.
overrideMode="Allow": This attribute determines whether the configuration settings specified within the
The <rewrite> section is configuring a URL rewriting rule named "server" that matches any URL and rewrites it to "server.js". to ensure that all incoming requests are routed to the "server.js" file, which serves as the entry point for the Node.js application.
your-domain-folder/
├── server.js
└── web.config
IIS Configuration Editor
The "config unlock" feature is especially useful when you encounter errors like "This configuration section cannot be used at this path" or when you need to make changes to configuration settings that are restricted by default.
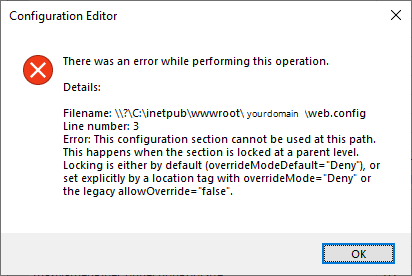
When a configuration section is locked, it means that the settings within that section cannot be modified at the current level.
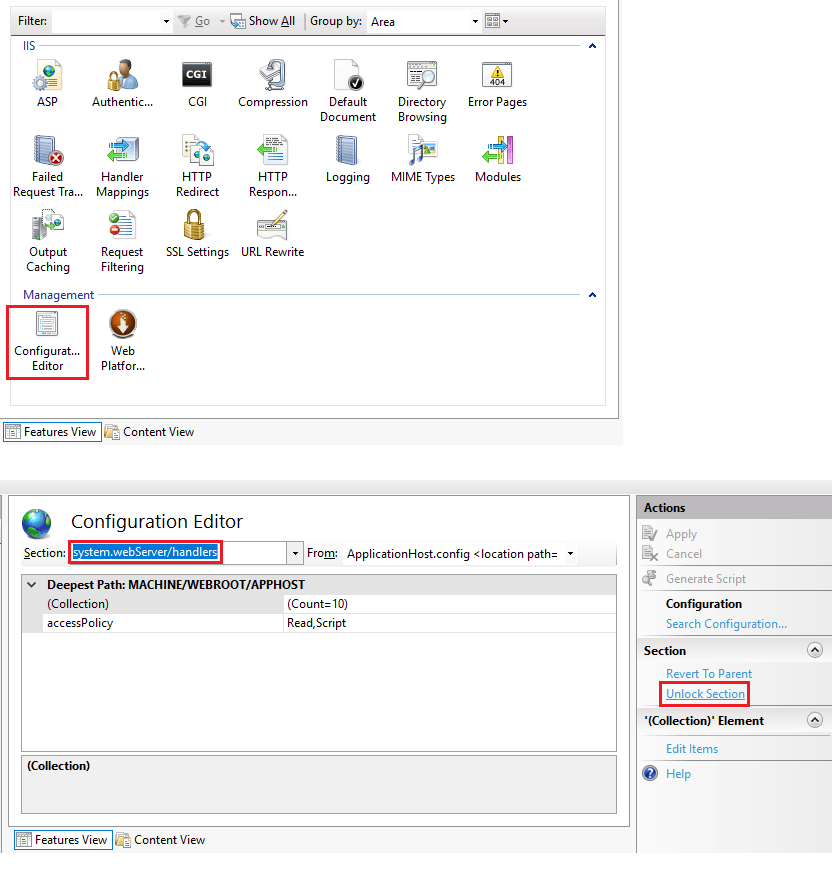
To unlock a configuration section in IIS, you can follow these steps:
- Open the IIS Manager on your Windows Server.
- Navigate to the level where the configuration section is locked. This can be the site level.
- Double-click on the "Configuration Editor" icon in the IIS Manager.
- In the "Configuration Editor" window, select the section you want to unlock (system.webServer/handlers) from the drop-down list under the "Section" field.
- Click on "Unlock Section".
Adding Express App
If you want to add an Express app to your Node.js application running on Windows Server with IIS, you'll need to keep the existing server.js file and create an additional app.js file.
This is an example project structure that can be used as a foundation for your express app:
your-project-name/
├── docs/
├── node_modules/
├── src/
│   ├── config
│   │   └── db.js
│   ├── models
│   │   └── actions.js
│   ├── routes
│   │   └── actions.js
│   └── app.js
├── .env
├── .gitignore
├── package.json
├── package-lock.json
├── README.md
├── server.js
└── web.config
By keeping the server.js file at the root, it acts as the entry point for your application. When you run your Node.js application, it will execute the code defined in the server.js file to start the server and listen for incoming requests.
server.js file: This file serves as the entry point for your Node.js application.
const app = require('./src/app.js');

const port = process.env.PORT || 3000;

app.listen(port, () => {
  console.log(`Server started on port ${port}`);
});
src/app.js file: This file is where you define routes, middleware, and other configurations specific to your Express app.
const express = require('express');
const cors = require('cors');
const bodyParser = require('body-parser');
const actionsRouter = require('./routes/actions');
const connectToDB = require('./config/db')

// load environment variables from a .env file
require('dotenv').config();

const app = express();

// Set up routes
app.use('/actions', actionsRouter);

// Connect to MongoDB
connectToDB();

// Set up middleware
// Allows web applications to make cross-origin requests to resources on a different domain
app.use(cors());
app.use(bodyParser.json());

module.exports = app;
Conclusion
Running Node.js on a Windows Server with IIS brings together the best of both worlds. By utilizing the power of Node.js technology on a Windows Server, you can take advantage of a reliable and secure environment that integrates seamlessly with your existing infrastructure.
With Node.js, you can build high-performance web applications that handle concurrent connections and heavy traffic loads efficiently. Its event-driven, non-blocking I/O model ensures exceptional performance and responsiveness, making it a great choice for applications that require speed and scalability.
By combining Node.js with IIS, you can tap into the advanced features and capabilities of IIS, such as load balancing, caching, and SSL support. This integration allows you to leverage the strengths of both technologies, creating a robust platform for your web applications.
So, if you have a Windows Server, don't miss out on the benefits of Node.js technology. Embrace the power of Node.js on a Windows Server with IIS and unlock the full potential of your web applications.