Creating a Dynamic Timer in React with useState Hook
Learn how to create a dynamic timer in React using useState hook with this easy-to-follow tutorial.
Create React Project
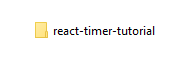
To begin, creating a folder for the project is the first step. The name convention for the folder should be 'your-project-name'.
It's a good practice to give it a name that is descriptive of what your project is about. For example, if you are building a timer tutorial in React, you could name your project 'react-timer-tutorial'.
Once you have created the folder, the next step is to open Visual Studio Code. You can do this by either dragging the folder to Visual Studio Code or by opening Visual Studio Code and then selecting 'File' > 'Open Folder' to navigate to your project folder.
If you choose to open Visual Studio Code via command line (cmd), you can navigate to your project folder in the cmd and then type "code ." to open it in Visual Studio Code.
After you have your project folder open in Visual Studio Code, you are ready to start building your project.
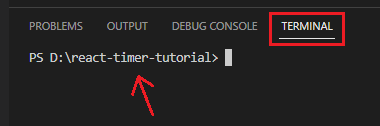
Open Terminal:
Ctrl + Shift + `

Once you've created the project folder, you'll need to navigate to that folder in your terminal. You can do this by using the 'cd' command, followed by the path to your project folder.
Once you're inside your project folder, you can use the 'npx' command to create a new React app. This command will set up a basic React project structure for you, with all the necessary dependencies and configurations.
npx create-react-app ./
The ./ refers to the current directory. The period (.) represents the current directory, and the forward slash (/) is used to indicate that we want to create the React app in the current directory. This is because the "create-react-app" command creates a new folder with the app's name, and we want that folder to be created in the current directory.
This process might take a few minutes, depending on your internet speed and the performance of your computer. Once it's finished, you should see a message in your terminal indicating that your React app has been successfully created.
Result:
Material Icon Theme VS Code extension
I have installed an extension called "Material Icon Theme", which is the reason you can see a cool set of icons in the Visual Studio Code screenshot.
With this extension, you can easily recognize different types of files, such as folders, images, React components, and many more, just by looking at the icon. It's a handy tool to have in your coding environment, making it easier to navigate and find what you need.
The "Material Icon Theme (Philipp Kief)" is a popular Visual Studio Code extension that provides a set of icons for files and folders in the Explorer pane.
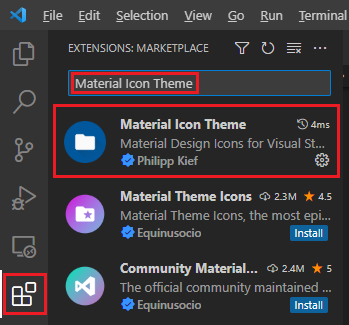
For example, it will show a distinct icon for a JavaScript file, a CSS file, or a folder, making it easier to differentiate between them at a glance. This can save you time and make your workflow more efficient.
Material Icon Theme (Philipp Kief)
Debug Your React App
The command npm start is used to start the development server. Once you run this command in your project directory, the server will start and your app will be served on your local machine.
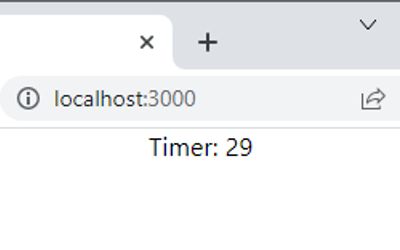
This means that you'll be able to access the app in your web browser by going to http://localhost:3000, which is the default port used by the development server. Any changes you make to the code will automatically trigger a reload of the app in the browser, so you can see the changes right away.
npm start
You can now view your app in the browser by clicking "Follow link" or Ctrl + Click

Building a Timer Component
React is a powerful and popular JavaScript library that allows you to build user interfaces using reusable components. By breaking down your UI into smaller, modular components, you can create applications that are more efficient, maintainable, and scalable.
It allows you to create reusable code that can be used in multiple places throughout your Ipplication. This can save you time and effort when building and updating your application.
With React's built-in state management tools, you can ensure that your components update and render efficiently as the state of your application changes.
First step to renaming a file and deleting some code is to navigate to the src folder in your React project and open the 'App.js' file.
Once you've opened the App.js file, you can go ahead and delete all of the code inside the <div className="App"></div> tags. This will leave you with an empty App component.
Next, you'll want to rename the App.js file to 'App.jsx'. This is because the .jsx file extension is commonly used for files that contain JSX syntax.
After you've renamed the file, your code should look something like this:
import React from 'react'
import './App.css'

function App () {
  return (
    <div className="App">
      {/* Timer */}
    </div>
  )
}

export default App
Now, we will add a Timer component:
const Timer = () => {
  let seconds = 1
  return (
    <div>
      Timer: {seconds}
    </div>
  )
}
Next, we will place the component inside the App div.
<div className="App">
  <Timer />
</div>
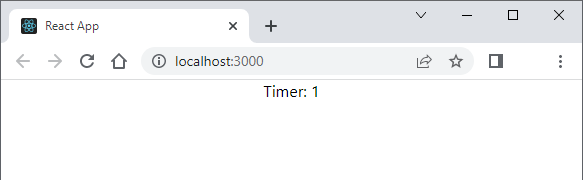
This code defines a React functional component called Timer. The component simply renders an HTML div element that displays a message "Timer" along with the value of a seconds variable, which is initialized to 1.
The 'const' keyword is used to declare the function as a constant. The function is defined using an arrow function syntax, which is a concise way of defining functions in JavaScript. The function takes no arguments and simply returns a JSX expression that will be rendered to the browser.
Overall, this code provides a basic starting point for a timer component in React, but currently, it does not update the value of seconds.
Dynamic Timer in React Using useState
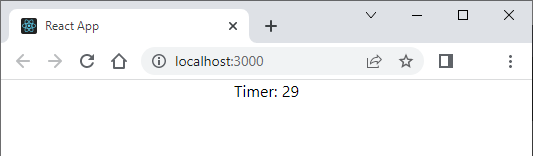
In the previous code, we had a simple component that displayed a static value of 1 for the number of seconds. In order to make the timer dynamic, we've made some changes to the code. We've added the useState hook to the component, which initializes the seconds state variable to 0.
We've also added a 'setTimeout' function to update the seconds value every second by using the 'setSeconds' function, which is provided by the 'useState' hook. This will cause the Timer component to display an updated value for the number of seconds every second.
setTimeout(() => {
  setSeconds(seconds + 1)
}, 1000)
So, by adding the 'useState' hook to the component, we are now able to keep track of the state of the timer and update it dynamically over time.
In order to use useState in our React components, we need to import it from the react library. We can do this by adding the following import statement at the top of our component file:
import React, { useState } from 'react'
The reason we use the curly braces around useState is because it is not the default export of the react module. Instead, it is a named export, which means we have to explicitly import it by name. Once we've imported useState, we can use it in our component to manage state and re-render our component when state changes.
import React, { useState } from 'react'
import './App.css'

function App () {
  return (
    <div className="App">
      <Timer />
    </div>
  )
}

const Timer = () => {
  const [seconds, setSeconds] = useState(0)

  setTimeout(() => {
    setSeconds(seconds + 1)
  }, 1000)

  return (
    <div>
      Timer: {seconds}
    </div>
  )
}

export default App
In React, 'useState' is a hook that allows us to add state to functional components. The 'useState' hook returns an array with two values. The first value is the current state value and the second value is a function that allows us to update that state value.
In the code const [seconds, setSeconds] = useState(0), we are using 'useState' to initialize a state variable called 'seconds' with an initial value of 0. The 'setSeconds' function is used to update the seconds state value.
When we call 'setSeconds' with a new value, React will re-render the component with the updated state value. This allows us to create dynamic and interactive components in React.
Summary
In React, we can use the useState hook to create state variables that can be updated by the component. In our Timer component, we used the useState hook to create a 'seconds' variable that starts at 0 and can be updated by calling the 'setSeconds' function.
We used the 'setTimeout' function to update the 'seconds' variable every second, and displayed the updated 'seconds' value in the component. By doing this, we created a dynamic Timer component that updates every second.
Overall, the 'useState' hook is a powerful tool that allows us to create stateful components in React.
References
Related Articles