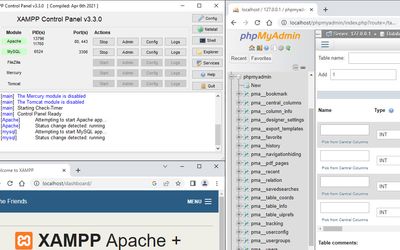
Quick Setup Steps
You can create a website on your local computer using XAMPP and WordPress. It allows you to build and test your site before making it public. Just follow these steps, and you'll have a playground to experiment with.
- Download XAMPP.
- Install XAMPP.
- Start the Control Panel.
- Download WordPress.
- Copy the WordPress files to the "xampp/htdocs/yourdomain" directory.
- Start Apache and MySQL.
- Open your browser and navigate to
http://localhost/yourdomain. - Completing the WordPress Installation.
- Open the phpMyAdmin web interface.
- Create an empty database.
- Install a backup plugin.
- Configure the file upload size.
- Import your existing WordPress backup.
- Set up URL rewriting.

So, let's dive into the installation process step by step. I'll guide you through it, and soon you'll have your own local environment set up and ready to go! Before we proceed, let me provide you with a quick overview so that you have a clear understanding of what we're doing here.
From Local Development to Live Environments
I wanted to share something interesting about my work in software development. You see, in our field, it's crucial to have multiple environments to work with.
We typically work with three main ones: production, staging, and development (local). Let me explain why they are so important.
Firstly, we have the production environment, which is the live system that our customers use. It's like the final destination for our software.
We always want to make sure this environment is stable and running smoothly because any issues here directly impact our product and, more importantly, our customers. So, we're extra cautious and try to avoid making any changes directly to the production environment.
"The best error message is the one that never shows up." - Thomas Fuchs
When I'm working on developing new features or fixing bugs, I do all the coding and testing on my local computer (development environment). This allows me to freely experiment without any risk of disrupting the live system. Once I have a version that I believe is ready, I upload it to the staging environment.
In the staging environment, we perform comprehensive testing to ensure that everything works as expected. We simulate real-world scenarios and carefully check for any potential issues. If everything looks good and passes all the tests, only then do we proceed to upload the changes to the production environment.
By following this process, we minimize the chances of introducing any bugs or glitches that could affect our customers experience.
XAMPP Simplifies the Process
So, to make a website work, we need a few essential components. First, we need a language that can create web pages, like PHP. This language allows us to build the dynamic elements and functionality of our website.
Next, we require a web server that can handle the requests coming from users browsers. It's like the middleman between the user and the website.
Additionally, we need a database to store all the important data, such as user information and blog content.
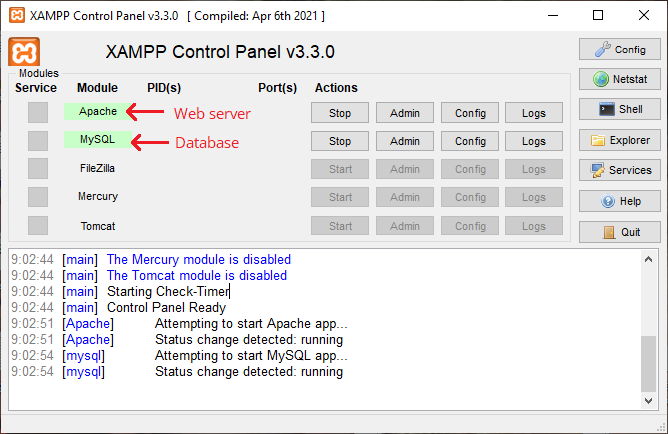
Now, this is where XAMPP comes in. It's a software package that simplifies the whole process for us. XAMPP creates the environment we need to run our website smoothly.
It takes care of the installations and configurations that can be quite tricky and time-consuming otherwise. With XAMPP, we don't have to worry about setting up the web server, configuring the database, or dealing with complex technical details.
It saves us a lot of headaches and allows us to focus more on building and developing our website.
Download XAMPP
Just go to the XAMPP website and look for the downloads section. Choose the version that matches your operating system. Click on the download button, and the XAMPP setup file will start downloading.
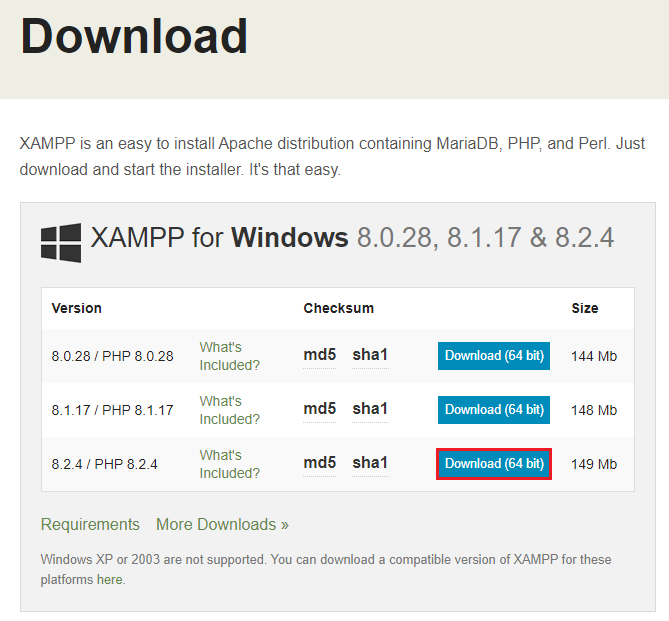
You can find the official XAMPP website and download it by visiting this link: https://www.apachefriends.org/download.html
Install XAMPP
After you run the installation file, you might come across an alert. It could ask if you have an antivirus program running, which could potentially slow down the installation. In this case, just click on Yes to continue with the installation.

This message advises you to avoid installing the program in the "Program Files" directory. So, when you see this warning message, just click on OK to acknowledge it and choose a different location for the installation.


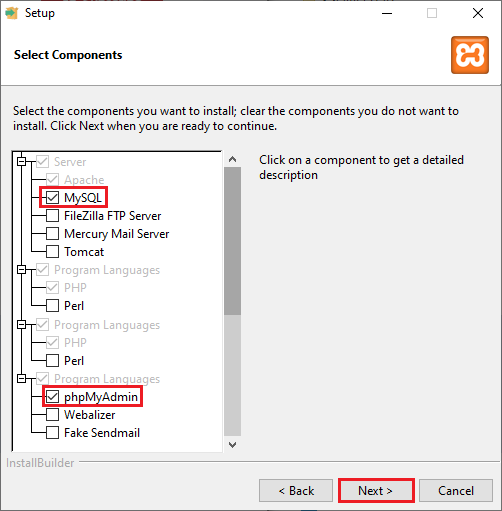
Just focus on MySQL and phpMyAdmin, and you'll be good to go. It's a straightforward way to keep things simple and avoid unnecessary installations.
Remember how we mentioned not installing XAMPP in the "Program Files" directory? We'll select a location that is easier to access and manage. Later on, we'll need to copy the WordPress files to that specific location.
C:\xampp

Select the English language and click on Next.

Click on Next.

Installation screen.

Allow access to private networks.

Start the Control Panel.

Download WordPress
WordPress is a popular platform for building websites. You need to download its files to use it.
https://wordpress.org/download/

Copy the WordPress files
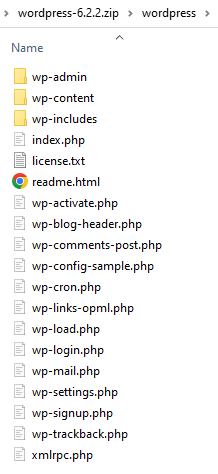
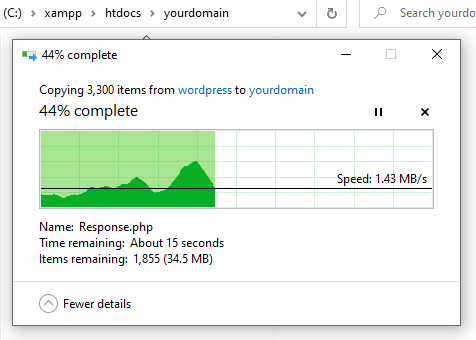
Copy the WordPress files to the xampp/htdocs/yourdomain directory: This step involves taking the downloaded WordPress files and placing them in a specific folder within the XAMPP software.
Start Apache and MySQL

Run WordPress on localhost
Open your browser and navigate to http://localhost/yourdomain
WordPress Installation
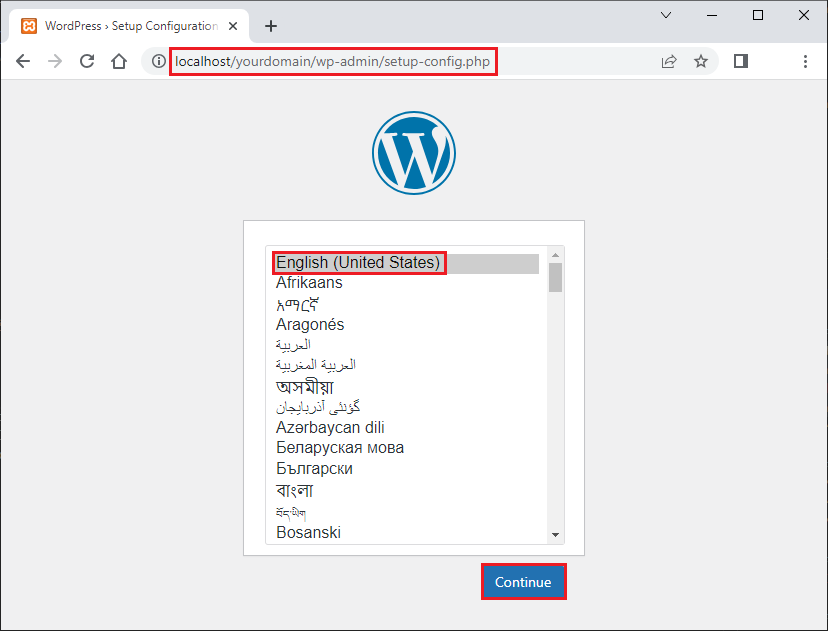
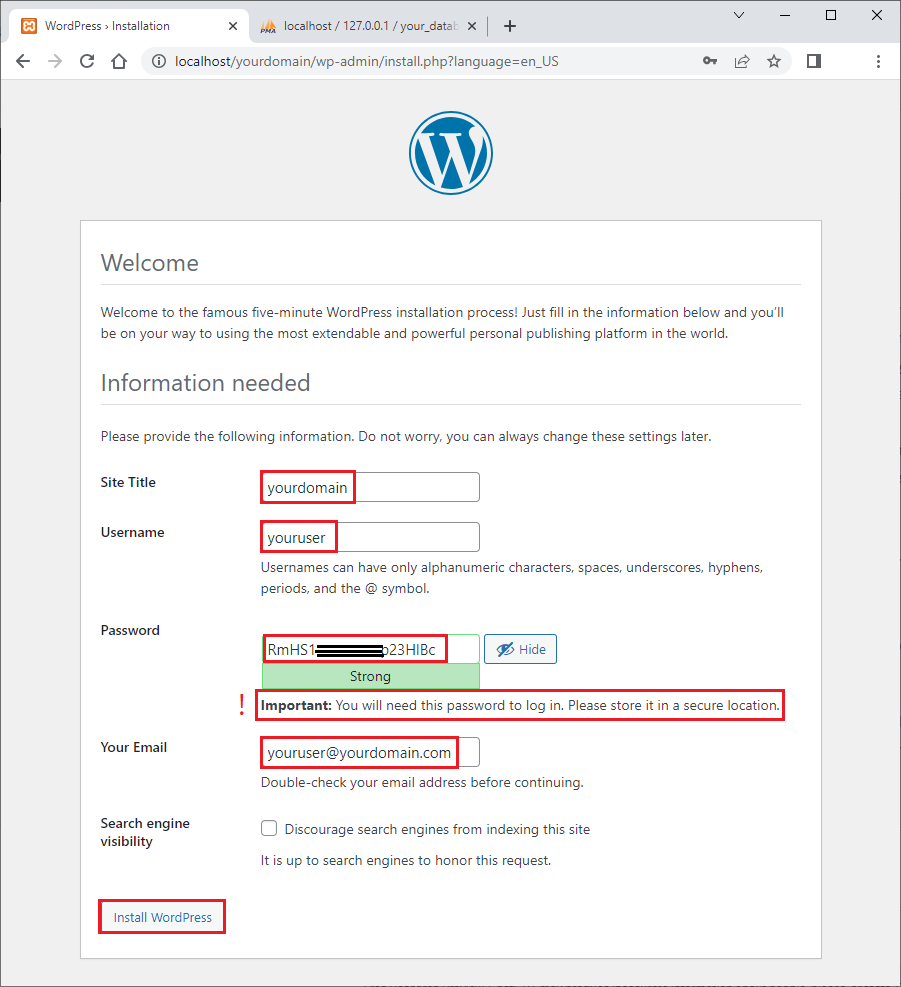
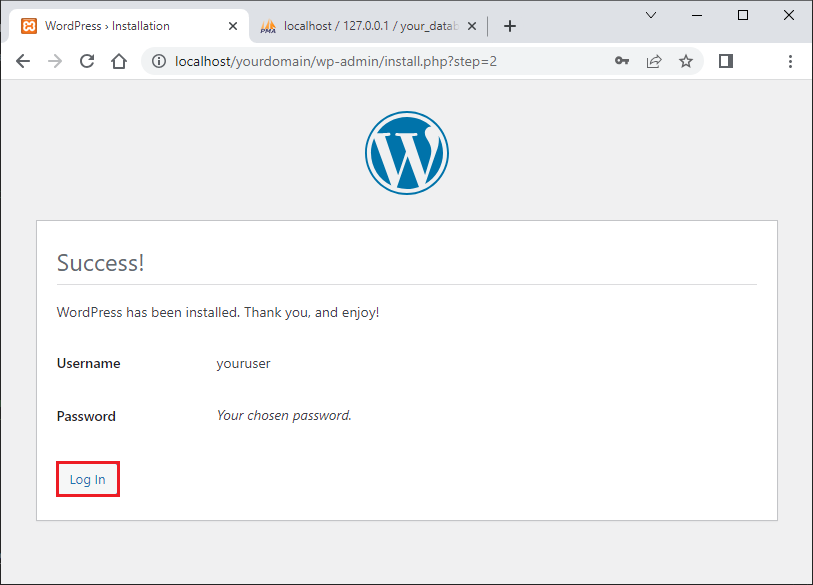
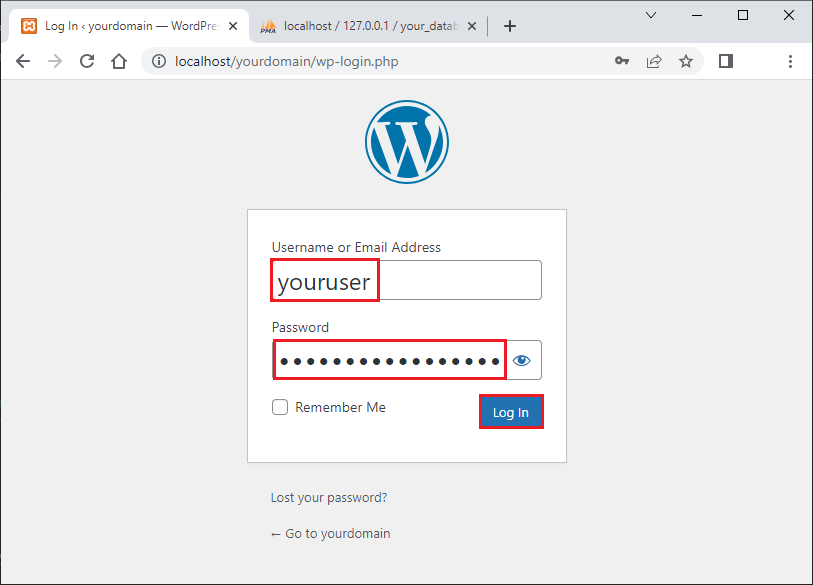
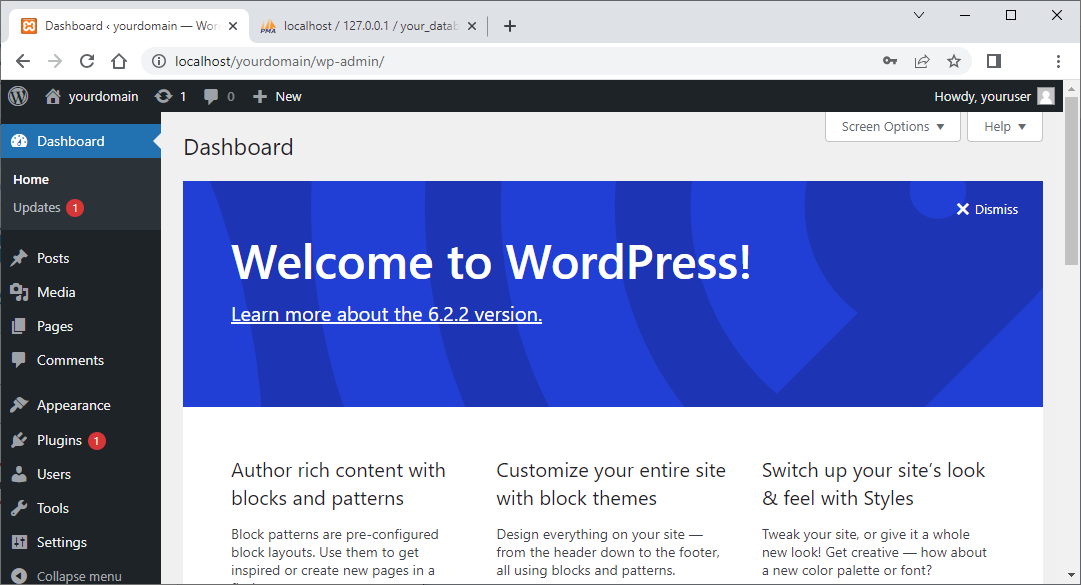
After copying WordPress files, there's a first-time installation process that takes place in the browser. Once you access your website, you will be automatically redirected to this setup path.
In this process, you'll be asked to provide basic information to personalize your website, including the site title, username, and password. It's a simple and fast step that ensures your WordPress installation is fully set up and ready for you to begin building your website.

Checklist:
- Are you sure the database exists?
- Are you sure the database server is running?
- Are you sure you have the correct username and password?
- Are you sure you have typed the correct hostname?
- Does the user root have permission to use the database?
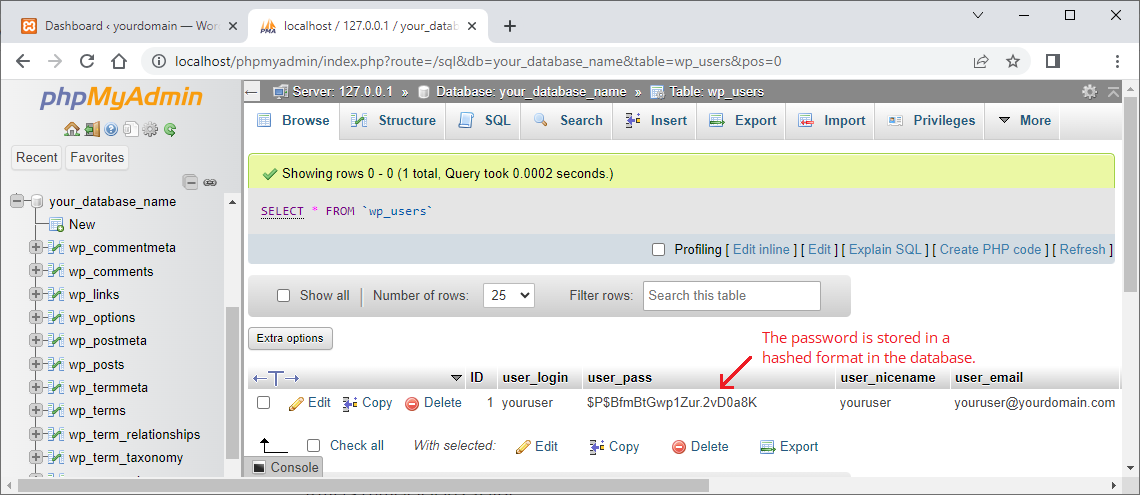
Please ensure that you create an empty database with the same name using phpMyAdmin.

Database Name: your_database_name
Username: root
Password: [empty]
Database Host: localhost
Table Prefix: wp_

Important Note: The "root" username is intended for development purposes only. For production environments, it is recommended to modify the wp-config.php file accordingly.
The wp-config.php file:
/** ... */

// ** Database settings - You can get this info from your web host ** //
/** The name of the database for WordPress */
define( 'DB_NAME', 'your_database_name' );

/** Database username */
define( 'DB_USER', 'root' );

/** Database password */
define( 'DB_PASSWORD', '' );

/** Database hostname */
define( 'DB_HOST', 'localhost' );

/** Database charset to use in creating database tables. */
define( 'DB_CHARSET', 'utf8mb4' );

/** The database collate type. Don't change this if in doubt. */
define( 'DB_COLLATE', '' );

/** ... */

/**
 * WordPress database table prefix.
 *
 * You can have multiple installations in one database if you give each
 * a unique prefix. Only numbers, letters, and underscores please!
 */
$table_prefix = 'wp_';

Install a Backup Plugin
Install a backup plugin that will assist you in migrating your existing WordPress site for local development.
Navigate to the Plugins section and click on Add New.
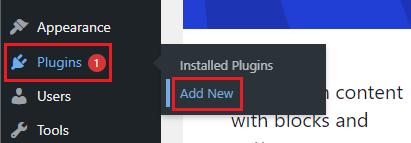
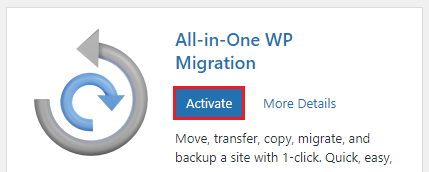
Look for the plugin called All-in-One WP Migration and install it.

Activate the plugin.
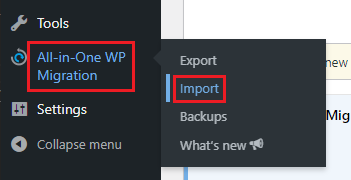
Click Import.
Configure the File Upload Size
Increase the maximum upload file size to 400 MB:
- Navigate to
C:\xampp\phpand make a copy of the php.ini file. - Create a backup file named
php-Backup-Current-Date.ini. - Open the php.ini file and modify the following two lines:
- Change
post_max_size=40Mtopost_max_size=400M. - Change
upload_max_filesize=40Mtoupload_max_filesize=400M. - Stop and start the Apache service using the XAMPP Control Panel.
- Refresh the plugin page to apply the changes.
post_max_size=400M
upload_max_filesize=400M
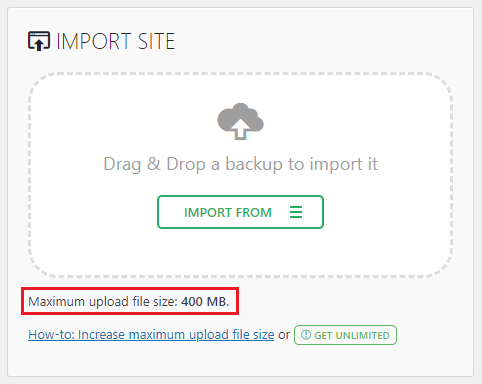
Import Your Existing Wordpress Backup
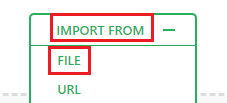
In the plugin interface, click on "Import From" and select "File".
Choose your .wpress backup file from your computer.

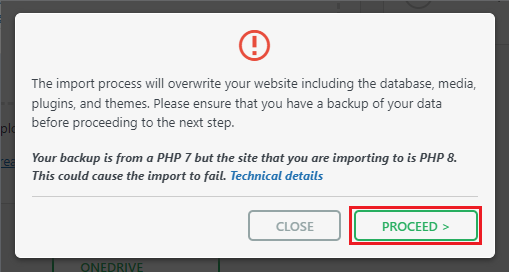
After selecting the file, you may see an alert. Make sure to read it carefully. If prompted, click on "Proceed" to continue with the import process.
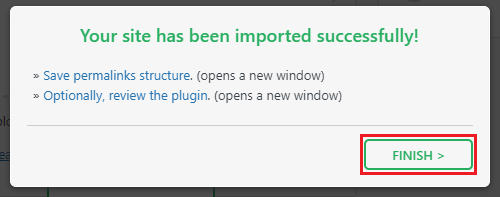
After clicking "Finish," refresh the website. You will then need to log in again using your backup user credentials.
Set Up Url Rewriting
If you encounter issues with URL rewriting after completing the backup, you can resolve them by editing the .htaccess file located at the root of your WordPress files. Modify the file to include the following Apache configurations.
# HTTPS forced by SG-Optimizer
<IfModule mod_rewrite.c>
    RewriteEngine On

    RewriteCond %{HTTP:X-Forwarded-Proto} !https
    RewriteCond %{HTTPS} off
    RewriteRule ^ https://%{HTTP_HOST}%{REQUEST_URI} [L,R=301]
</IfModule>
# END HTTPS
# BEGIN WordPress
# The directives (lines) between "BEGIN WordPress" and "END WordPress" are
# dynamically generated, and should only be modified via WordPress filters.
# Any changes to the directives between these markers will be overwritten.
<IfModule mod_rewrite.c>
RewriteEngine On

# Ignore index.php
RewriteRule ^index\.php$ - [L]

# Redirect images, CSS, and JS files to HTTP
RewriteRule .*\.((gif|jpg|jpeg|png|css|js))$ - [L]

# Rewrite all other URLs to index.php
RewriteCond %{REQUEST_FILENAME} !-f
RewriteCond %{REQUEST_FILENAME} !-d
RewriteRule ^(.*)$ index.php [QSA,L]
</IfModule>

# END WordPress
Conclusion
By following the steps outlined, you can now create and test your website on your own computer before making it live. XAMPP simplifies the process and provides all the necessary tools like Apache, MySQL, and phpMyAdmin.
Running WordPress locally gives you the freedom to experiment and customize your website without affecting the production environment.
It's a safe way to try out new features, design changes, and plugins before making them live. You can unleash your creativity and fine-tune your site to perfection, all while keeping the production environment untouched.
